how to make a website
Hello, everyone. I'm going to show you the easiest ways to create your own website, you don't need to know deeply Html PHP or another complicated website code and you don't need to pay much money to make it. You
Blogger | Free for life
Sign up your google account and paste this address into your browser's address bar https://www.google.co.th/intl/en/about/products/ and click Blogger.


Choose your website title, a website's address, and website template.

Now, start writing your first post by click New post.


Now your first website is online.

However, free website template from blogger is not the best template you can download free blogger template on the internet and follow my instruction below.
- Find blogger template by google or bing search
- Download the RAR file
- Extract XML file to a folder


5. Choose the XML file you extracted before and click upload
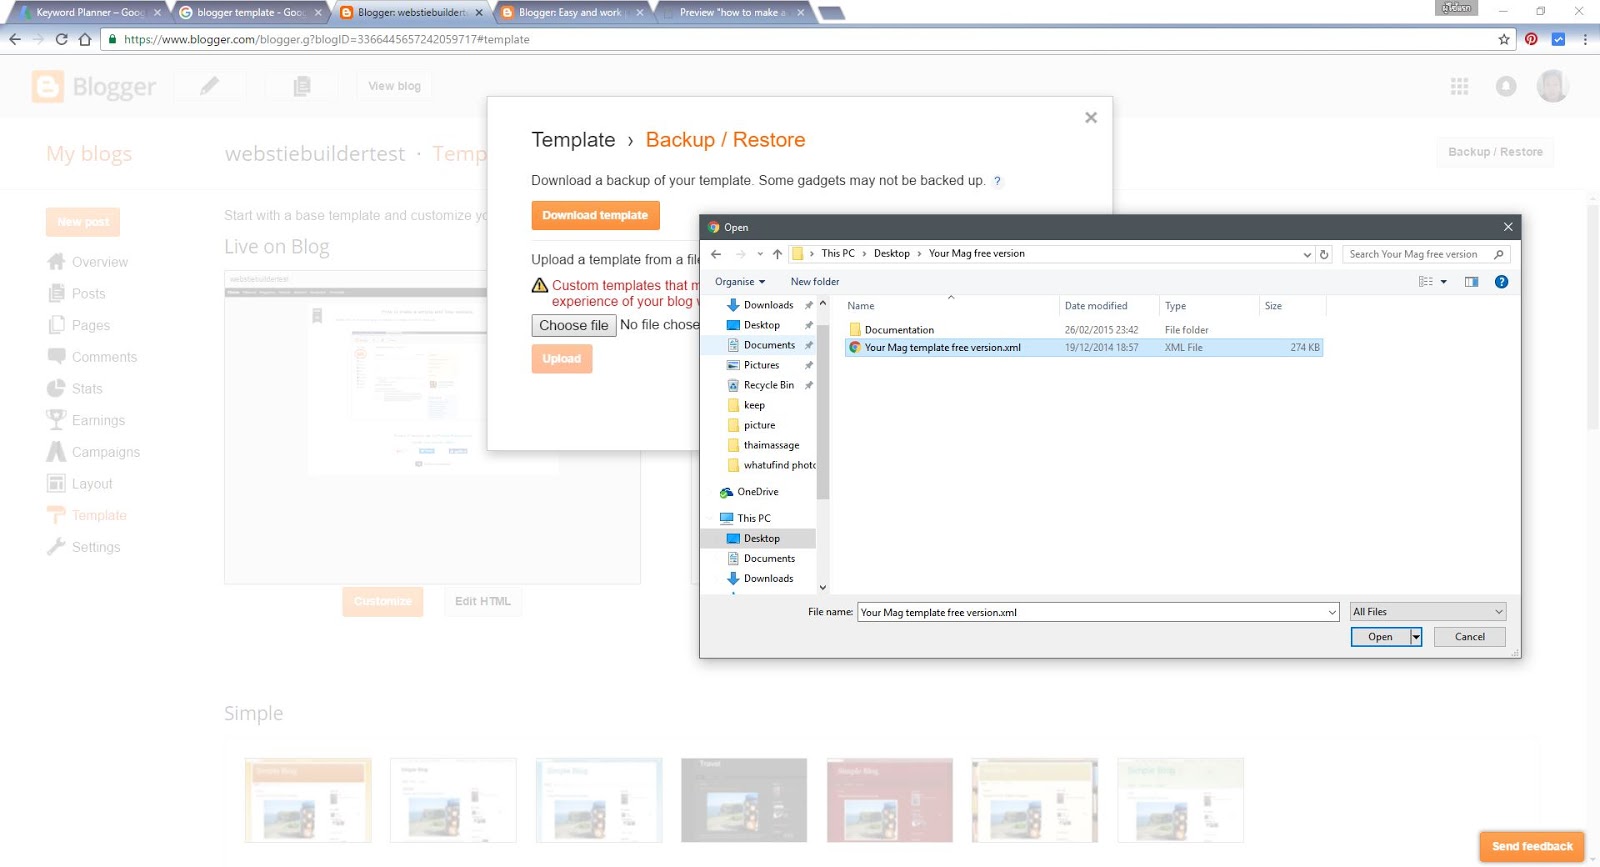
Now your website looks more beautiful and has everything you need such as social bookmark toolbar, beautiful menu bar, and your website is easier to navigate.

You can also add your third-party domain to blogger by doing the following steps (source: google support)
Connect to your non-Google domain from Blogger
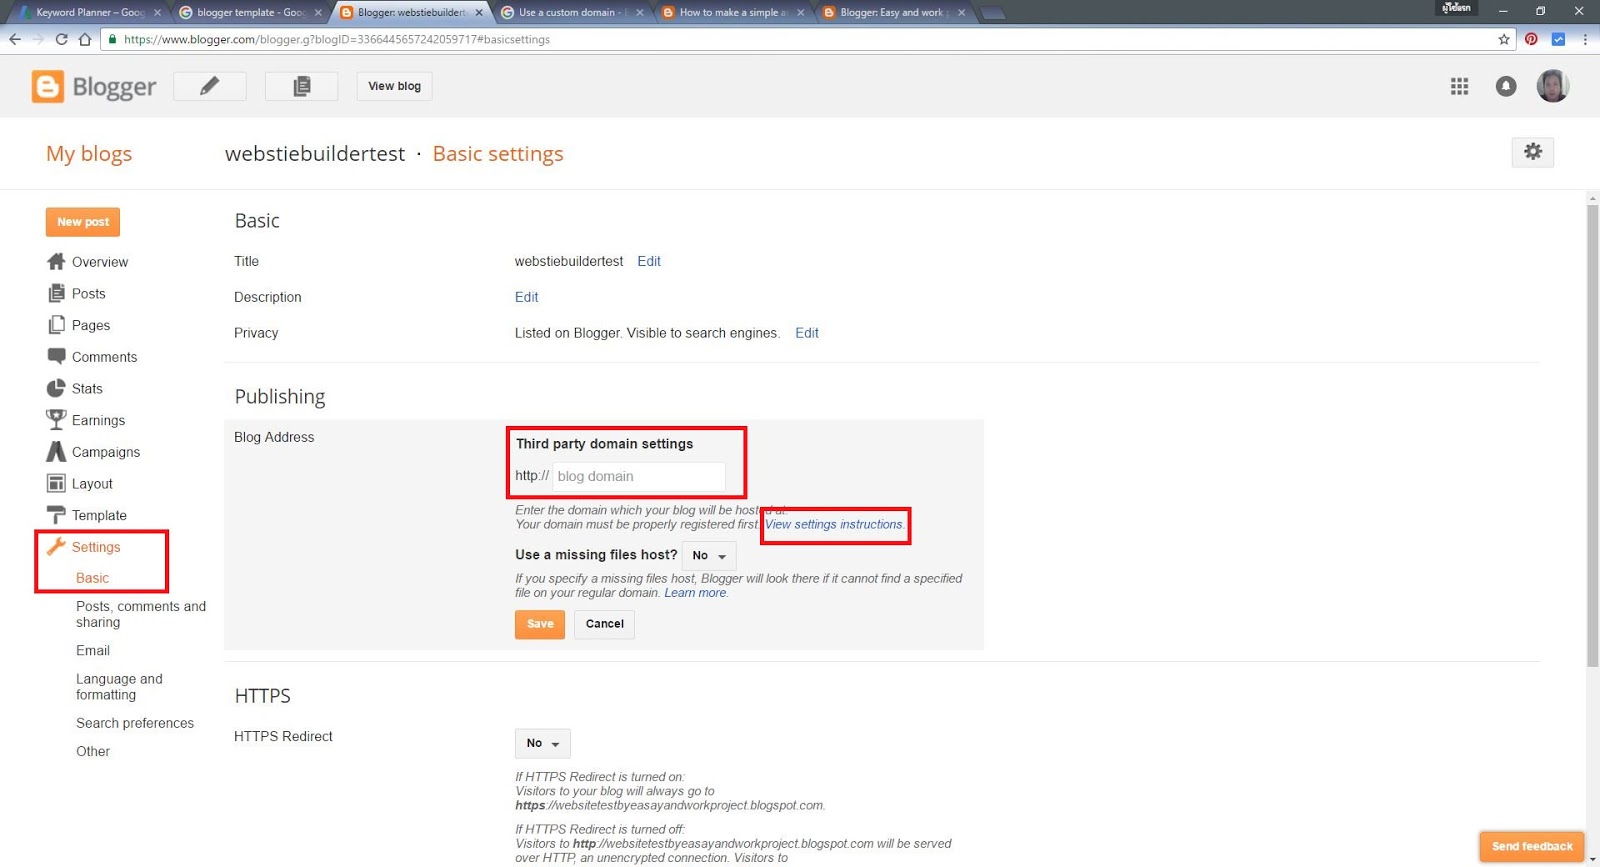
Now your website with your own custom domain name is ready to go. It's time to make a new and fresh content and doesn't forget to apply Adsense or other third party Publisher program for some money to pay domain name cost, if your contents are good you may make it a second income.
The disadvantage of using blogger as your website hosting.
- Built-in blogger template not beautiful.
- You cannot make custom website address like WordPress
- Google team can terminate your blog anytime if your blog contains some inappropriate contents
- It's hard to move your website to new a new platform like WordPress
- You cannot make a forum, Webboard on blogger
- Space for image limit to 15 GB but you can rent more space from google photos
The Advantage of using blogger as your website hosting.
- Free of charge and 15 GB storage is enough for a small to medium website.
- Your website uses google's server storage and bandwidth so your website will load fast and uptime is good
- Your website can apply for Adsense fast (2 weeks to my first blogger's blog)
- There are so many blogger templates on the internet that cost not high or just put template's creator link in footer only and you get free blogger template (beware some blogger template that adds some link to malicious website and that make your website banned from search engines)
- Blogger gives HTTPS to every subdomain (Https not working if you use a third-party domain, you need to buy it from the website you use their service) < Now Blogspot allow a user to get HTTPS for free check out here (2018 updated) see more details here


Comments
Post a Comment